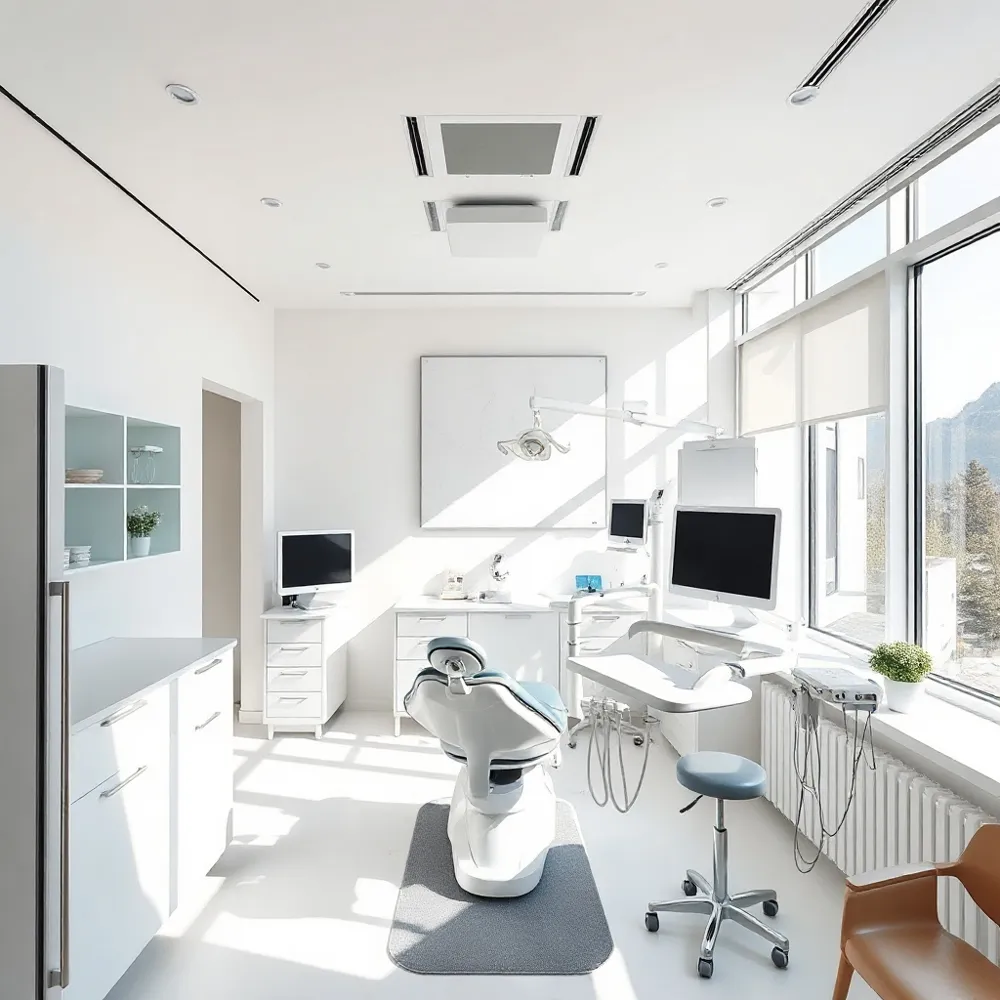
Why Understanding the Implant Timeline Matters
Understanding the implant timeline helps patients see how a missing tooth becomes a permanent, natural‑looking solution. The journey begins with a comprehensive consultation and 3‑D CBCT scan at Southern Boulevard Dental, where bone quality, gum health, and treatment goals are evaluated. If needed, bone grafting or sinus lift is performed before the titanium post is surgically placed. Over the next three to six months, osseointegration secures the implant, after which an abutment is attached and a custom crown is fabricated using digital impressions. Each step—diagnosis, surgery, healing, abutment placement, and final restoration—relies on the previous one, ensuring stability and optimal aesthetics. Advanced imaging and patient‑centered planning allow precise, predictable outcomes and a comfortable experience for every Rio Rancho patient today.
Milestone 1 – Comprehensive Consultation & Diagnostic Imaging
| Phase | Key Actions | Typical Timeline | Critical Factors |
|---|---|---|---|
| Consultation & Imaging | • Review medical & dental history | ||
| • Panoramic X‑ray | |||
| • CBCT scan (3‑D bone assessment) | |||
| • Digital treatment plan (CAD/CAM) | 1–2 visits (≈ 1 week) | Systemic health, bone volume & density, proximity to nerves/sinuses | |
| Planning | • Determine implant position, angulation, depth | ||
| • Identify need for grafts or sinus lift | Concurrent with imaging | Accurate imaging, software precision |
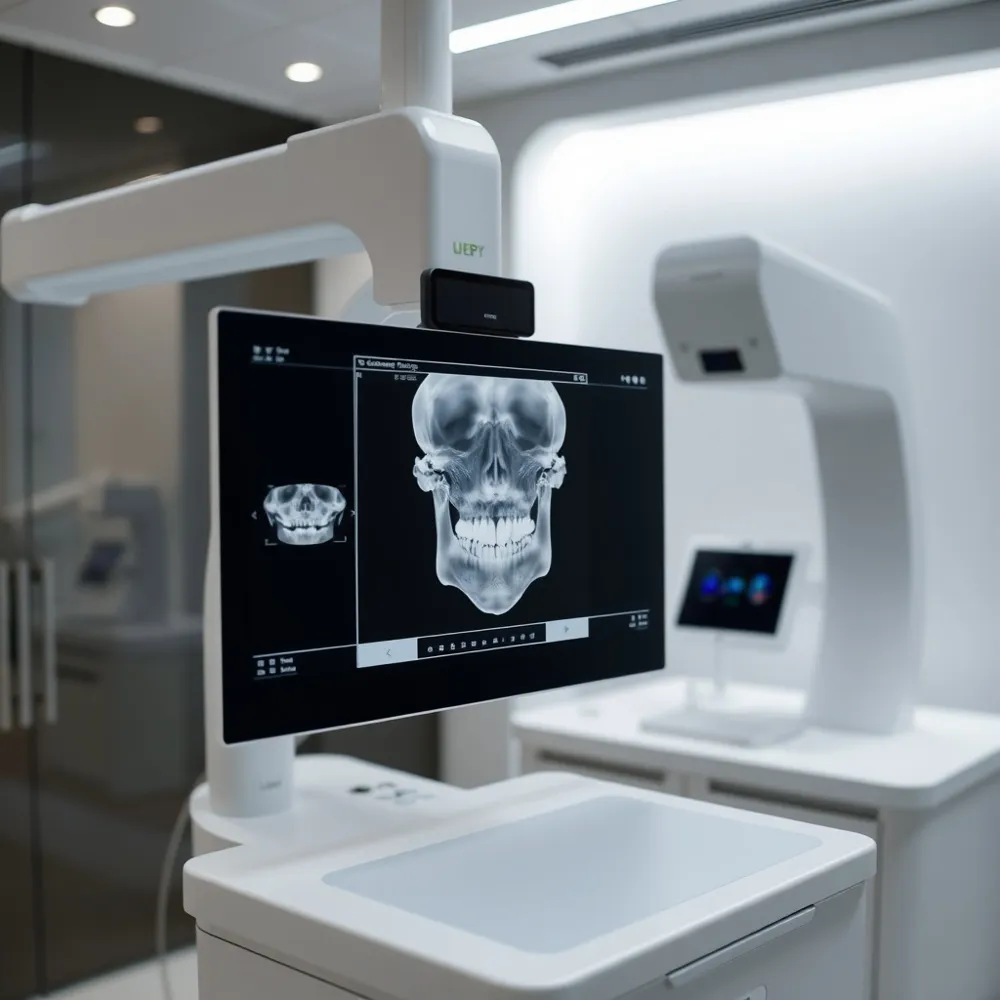
![]() The first step in a dental implant journey begins with a thorough review of the patient’s medical and dental history, allowing the clinician to uncover any systemic conditions, medications, or previous oral issues that could affect implant success. A detailed diagnostic work‑up follows, typically employing a panoramic X‑ray for an overall view of the dentition and a cone‑beam computed tomography (CBCT scan) that delivers high‑resolution, three‑dimensional images of the jawbone. These scans enable the dentist to assess bone volume, density, and the proximity of vital structures such as nerves and sinuses. With this data, a personalized digital treatment plan is created using CAD/CAM technology, which maps the optimal implant position, angulation, and depth while also planning for any necessary bone grafts or sinus lifts. This patient‑centered, technology‑driven approach ensures that each implant is placed with precision, laying a solid foundation for a durable, natural‑looking restoration.
The first step in a dental implant journey begins with a thorough review of the patient’s medical and dental history, allowing the clinician to uncover any systemic conditions, medications, or previous oral issues that could affect implant success. A detailed diagnostic work‑up follows, typically employing a panoramic X‑ray for an overall view of the dentition and a cone‑beam computed tomography (CBCT scan) that delivers high‑resolution, three‑dimensional images of the jawbone. These scans enable the dentist to assess bone volume, density, and the proximity of vital structures such as nerves and sinuses. With this data, a personalized digital treatment plan is created using CAD/CAM technology, which maps the optimal implant position, angulation, and depth while also planning for any necessary bone grafts or sinus lifts. This patient‑centered, technology‑driven approach ensures that each implant is placed with precision, laying a solid foundation for a durable, natural‑looking restoration.
Milestone 2 – Tooth Extraction, Bone Grafting & Healing
| Phase | Key Actions | Typical Timeline | Critical Factors |
|---|---|---|---|
| Atraumatic Extraction | • Use periotomes, piezo‑electric, or sectioning | ||
| • Preserve alveolar walls | |||
| • Allow natural clot formation | 1–2 weeks for soft‑tissue closure | Technique sensitivity, patient comfort | |
| Bone Grafting / Sinus Lift | • Choose graft material (autograft, allograft, xenograft, synthetic) | ||
| • Place graft, protect socket | 3–6 months for osointegration | Graft material selection, smoking status, systemic health | |
| Healing | • Monitor integration (osteoconduction/osteoinduction) | ||
| • Maintain oral hygiene | 3–6 months (varies) | Nutrition, vitamin D/calcium, non‑smoking |
![]() Atraumatic extraction techniques focus on preserving the alveolar walls and minimizing trauma to the surrounding bone. Using periotomes, piezo‑electric instruments, or sectioning the tooth helps keep the socket intact, allowing a natural clot to form and soft‑tissue to heal within 1‑2 weeks. When the post‑extraction socket lacks sufficient height or width, a bone graft or sinus lift becomes necessary to create a stable foundation for the future implant. Graft materials range from autografts (patient’s own bone) to allografts, xenografts, and synthetic calcium‑phosphate composites; each supports new bone formation differently, but all aim to achieve a dense, vascularized matrix. Typical graft healing periods span 3‑6 months, depending on the graft size, material, and patient factors such as smoking or systemic health. During this time, the graft integrates through osteoconduction and, when applicable, osteoinduction, gradually replacing the graft material with native bone. A well‑chosen graft material, combined with proper surgical technique, enhances long‑term implant stability by preserving ridge dimensions and providing adequate bone density for osseointegration.
Atraumatic extraction techniques focus on preserving the alveolar walls and minimizing trauma to the surrounding bone. Using periotomes, piezo‑electric instruments, or sectioning the tooth helps keep the socket intact, allowing a natural clot to form and soft‑tissue to heal within 1‑2 weeks. When the post‑extraction socket lacks sufficient height or width, a bone graft or sinus lift becomes necessary to create a stable foundation for the future implant. Graft materials range from autografts (patient’s own bone) to allografts, xenografts, and synthetic calcium‑phosphate composites; each supports new bone formation differently, but all aim to achieve a dense, vascularized matrix. Typical graft healing periods span 3‑6 months, depending on the graft size, material, and patient factors such as smoking or systemic health. During this time, the graft integrates through osteoconduction and, when applicable, osteoinduction, gradually replacing the graft material with native bone. A well‑chosen graft material, combined with proper surgical technique, enhances long‑term implant stability by preserving ridge dimensions and providing adequate bone density for osseointegration.
Milestone 3 – Implant Placement & Primary Stability (The 3/2 Rule)
| Phase | Key Actions | Typical Timeline | Critical Factors |
|---|---|---|---|
| Guided Surgery & Drilling | • Use guided surgery or osseodensification | ||
| • Create osteotomy to planned dimensions | Same day (≈ 1 hour) | Accurate CBCT planning, drill control | |
| Implant Insertion | • Insert titanium fixture | ||
| • Achieve insertion torque 30‑45 N·cm (primary stability) | Immediate | Bone density, torque measurement | |
| 3/2 Rule Verification | • ≥ 3 mm facial bone thickness | ||
| • ≥ 2 mm soft‑tissue height | At placement | Radiographic & clinical assessment |
![]() During the third milestone the dentist inserts the titanium fixture under local anesthesia, often with conscious sedation for anxious patients. Precision is essential; guided surgery and osseodensification techniques are employed to create an osteotomy that meets the required dimensions and maximizes bone density. Primary stability is achieved when the implant attains an insertion torque of 30‑45 N·cm, a mechanical lock that protects the fixture during the early healing phase and sets the stage for successful osseointegration.
During the third milestone the dentist inserts the titanium fixture under local anesthesia, often with conscious sedation for anxious patients. Precision is essential; guided surgery and osseodensification techniques are employed to create an osteotomy that meets the required dimensions and maximizes bone density. Primary stability is achieved when the implant attains an insertion torque of 30‑45 N·cm, a mechanical lock that protects the fixture during the early healing phase and sets the stage for successful osseointegration.
What is the 3‑2 rule for implants?
The 3/2 rule for dental implants measures two critical dimensions: 3 mm of bone thickness on the facial (front) side of the implant, and 2 mm of soft tissue (gum) between the implant and adjacent teeth. These measurements help ensure long‑term stability and natural aesthetics.
By confirming at least 3 mm of facial bone and 2 mm of soft‑tissue height, the clinician can predict a favorable emergence profile, minimize recession, and achieve a harmonious smile. Guided digital planning, CBCT imaging, and computer‑aided design allow the surgeon to visualize these parameters before the incision, while osseodensification compacting bone during drilling further supports the primary torque values. This systematic approach reduces micromotion, accelerates bone remodeling, and ultimately leads to a durable, functional restoration that blends seamlessly with surrounding dentition.
Milestone 4 – Osseointegration Healing Phase & Readiness Check
| Phase | Key Actions | Typical Timeline | Critical Factors |
|---|---|---|---|
| Osseointegration | • Bone cells bind to implant surface | ||
| • Secondary (biological) stability develops | 3–6 months (bone) | Bone quality, vitamin D, calcium intake | |
| Soft‑Tissue Healing | • Gums seal the implant | ||
| • Pink, healthy tissue | 1–2 weeks | Gentle oral hygiene, no trauma | |
| Readiness Evaluation | • Probing (no mobility) |
- Radiographic verification (periapical/CBCT) • Resonance Frequency Analysis (ISQ > 60) | End of healing period | Smoking, diabetes, nutrition, systemic health |
![]() After the titanium post is placed, the body begins a biological process called osseointegration, during which bone cells grow directly onto the implant surface and create a permanent bone‑to‑implant bond. This phase typically lasts 3‑6 months, although soft‑tissue healing occurs much earlier—about 1‑2 weeks—resulting in pink, healthy gums that seal the implant.
After the titanium post is placed, the body begins a biological process called osseointegration, during which bone cells grow directly onto the implant surface and create a permanent bone‑to‑implant bond. This phase typically lasts 3‑6 months, although soft‑tissue healing occurs much earlier—about 1‑2 weeks—resulting in pink, healthy gums that seal the implant.
Secondary stability, the biological lock that replaces the initial mechanical stability, depends on several patient‑related factors. Dense cortical bone, adequate vitamin D and calcium intake, and non‑smoking status promote strong bone remodeling. Conversely, smoking, uncontrolled diabetes, or poor nutrition can slow bone formation and increase the risk of micromotion, which may jeopardize the implant.
Clinicians evaluate readiness for the final restoration using a combination of methods. A gentle probing test checks for any mobility; a stable implant should feel immobile. Radiographic verification—usually a periapical X‑ray or CBCT scan—confirms that bone surrounds the implant without radiolucent gaps. Resonance Frequency Analysis (RFA) provides an Implant Stability Quotient (ISQ) score; values above 60 typically indicate sufficient stability for loading.
How to check if an implant is ready for restoration? An implant is ready for restoration when it has fully osseointegrated, meaning the bone has grown tightly around the fixture and the implant is clinically stable. The dentist will first perform a gentle probing test to assess mobility; any movement indicates the implant is not yet ready. Next, a radiographic image—typically a periapical X‑ray or CBCT scan—is taken to confirm that the bone surrounding the implant is dense, that the implant is correctly positioned, and that there are no radiolucent areas suggesting infection. The soft tissues should also be healthy, with no persistent inflammation, swelling, or drainage around the site. Once these clinical and radiographic criteria are met—usually after a healing period of 3 to 6 months—the implant can be safely restored with a crown, bridge, or denture.
Milestone 5 – Abutment Placement, Final Restoration & Long‑Term Care
| Phase | Key Actions | Typical Timeline | Critical Factors |
|---|---|---|---|
| Abutment Placement | • Torque‑controlled driver secures abutment | Immediate after readiness | Correct torque, proper fit |
| Digital Impression & Lab Work | • Intra‑oral scanner captures anatomy | ||
| • CAD/CAM milling of porcelain/zirconia crown | 1–2 weeks for lab turnaround | Accurate scan, shade matching, occlusion design | |
| Final Restoration | • Cementation or screw‑retention | ||
| • Bite check & occlusion adjustment | Same day as placement | Proper seating, occlusal harmony | |
| Maintenance | • Twice‑daily soft‑brush, floss/interdental brushes | ||
| • Alcohol‑free antimicrobial mouthwash | |||
| • Professional cleaning every 3–6 months | Ongoing | Patient compliance, avoid smoking/alcohol, control systemic conditions |
![]() Once the implant has fully osseointegrated, the next step is to attach the custom‑made abutment. Using a torque‑controlled driver, the clinician secures the abutment to the implant platform, creating a stable connector that accurately positions the future crown within the gum tissue.
Once the implant has fully osseointegrated, the next step is to attach the custom‑made abutment. Using a torque‑controlled driver, the clinician secures the abutment to the implant platform, creating a stable connector that accurately positions the future crown within the gum tissue.
A digital impression is then taken with an intra‑oral scanner. The data are sent to a CAD/CAM laboratory where a porcelain or zirconia crown is milled to match the patient’s shade, shape, and occlusion. This digital workflow eliminates distortions associated with traditional putty molds and shortens the laboratory turnaround time.
The final restoration is placed either with cementation or screw‑retention, depending on the case. After seating, the dentist checks the bite and makes any necessary occlusion adjustments to ensure comfortable chewing and speech.
Long‑term success hinges on a disciplined maintenance regimen: brush twice daily with a soft‑bristled brush, floss or use interdental brushes around the abutment, and rinse with an alcohol‑free antimicrobial mouthwash. Schedule professional cleanings every three to six months and avoid smoking, excessive alcohol, and uncontrolled systemic conditions such as diabetes.
What I wish I knew before dental implants? I wish I had realized that the surgery is performed under local anesthesia and post‑operative discomfort is usually mild and short‑lived, not the intense pain many fear. The entire treatment can span several months, especially if bone grafting is required, so planning ahead is essential. Good oral hygiene and regular dental check‑ups are just as important for implants as for natural teeth because neglect can lead to peri‑implantitis and threaten longevity. Overall health—especially uncontrolled diabetes, smoking, or low bone density—affects eligibility and healing, so a thorough medical evaluation is crucial. Finally, implants are not “maintenance‑free”; they require daily brushing, flossing, and professional cleanings to stay healthy for the long term.
Putting It All Together: The Value of Milestone Awareness
Successful dental‑implant therapy follows nine key milestones. 1) Initial consultation and imaging establish candidacy and a digital roadmap. 2) CBCT scans map bone volume. 3) Treatment planning uses 3‑D models and guided‑surgery templates. 4) Surgical placement of the titanium post provides primary stability. 5) Healing allows soft‑tissue closure. 6) Osseointegration (3‑6 months) bonds bone to the implant. 7) Abutment connection shapes the gum line. 8) Precise impressions lead to a custom crown or bridge. 9) Final restoration placement completes function and aesthetics. Southern Boulevard Dental combines CBCT, CAD/CAM and intra‑oral scanners with a patient‑centered, family‑oriented approach at each step. We encourage you to keep follow‑up visits, practice diligent oral‑hygiene, and stay actively involved—your engagement is the key to lasting success.